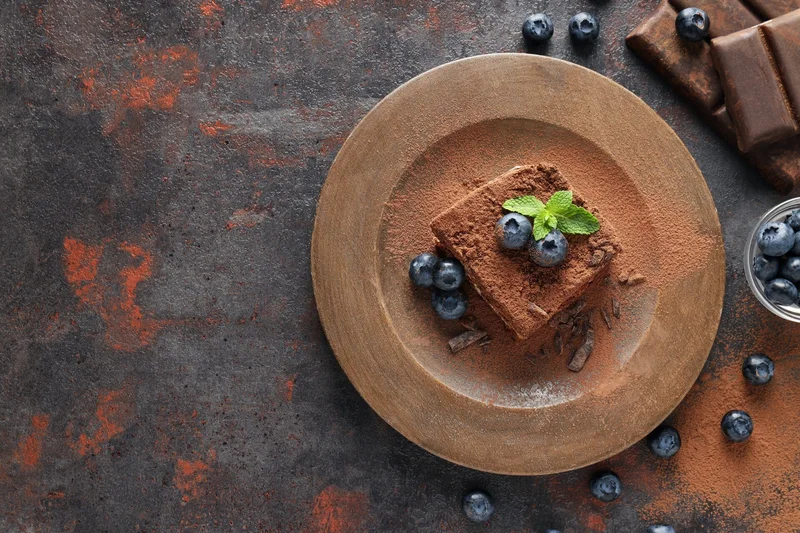
Chocolate mousse cake
Источник фото: https://ru.123rf.com/profile_atlasfoto
The mousse cake, the recipe for which I want to share, is quite simple to prepare.
Delicious, tender, aromatic, with an expressive chocolate taste! It is very light, after eating a piece there is no feeling of heaviness. Bake this cake and your guests will thank you! In total, it took me an hour to prepare it. And the refrigerator will do the rest for you.
Ингредиенты
For the biscuit:
Sugar - 100 g
Chicken eggs - 3 pcs.
Wheat flour - 80 g
Cocoa - 20 g
For the mousse:
Milk - 225 ml
Egg yolks - 4 pcs.
Sugar - 40 g
Gelatin powder - 10 g
Dark chocolate - 100 g
Cream 35% - 300 g
Рецепт
1. First, prepare the biscuit dough. To do this, beat the eggs with sugar into a fluffy cream. Beat for about 5-7 minutes.
2. In a separate bowl, mix cocoa and flour. Next we do this: add 3-4 tablespoons of the mixture to the eggs beaten with sugar, mix well with a whisk. We’re not playing too hard, but we’re not being gentle either :-) Next, add the remaining mixture in 2-3 additions, stirring the dough from bottom to top. I also do this with a whisk.
3. Pour the resulting dough into a mold (18 cm). I'll tell you how I bake biscuits. This particular form has a removable bottom. That is, the bottom can be removed, but the ring itself is not detachable. I do not grease this form with anything and do not line it with parchment. If you are not sure of your shape, then it is better to cover it with parchment. We do not lubricate the walls of the mold with anything!!! The biscuit “climbs and clings along them, rising up.” Bake the biscuit in an oven preheated to 180 degrees for 30-40 minutes. Find your way around your oven! Checking for a dry splinter is mandatory!
4. As soon as you take the biscuit out of the oven, turn the pan over onto glasses (mugs, cups, bowls, bowls...), as shown in the photo. This way the biscuit will definitely not fall off. Let it cool completely like this! In fact, if the biscuit is baked well, the sponge is dry, and its surface springs when pressed with your hand, then there is no need to turn it over. Just let it cool slightly in the pan, then remove and cool completely on a wire rack. I didn’t let this biscuit rest. I just cooled it completely and cut it right away.
5. While the biscuit is cooling, prepare the mousse. Let's prepare the products according to the list. P.S. We will only need the yolks; you can freeze the whites by placing them in a plastic container, and then, when necessary, defrost them and use them for their intended purpose.
6. Pour gelatin with water (room temperature), stir, set aside. It should swell. Read the instructions on the packaging!
7. Grind the yolks with 20 g. sugar (we will take it from the total amount indicated in the ingredients).
8. Mix the second half of the sugar with milk and put on gas. Bring almost to a boil (but do not boil!) so that the sugar dissolves.
9. Pour most of the milk and sugar in a thin stream into the yolks ground with sugar, stirring well with a whisk. This is how the mixture will turn out.
10. Next, return the resulting milk-egg mixture back to the bowl with milk, put it on gas and, stirring constantly, bring the mixture to a slight thickening. Be careful not to overheat, otherwise the yolks will curdle! If you have a thermometer, then the temperature of the mixture should be about 83 degrees.
11. Remove the mixture from the stove, let it cool for just a minute, stirring constantly. Then add chocolate and gelatin, which has already swelled. Mix well. The temperature of the egg-yolk mixture is sufficient for the gelatin to dissolve and the chocolate to dissolve.
12. This is how the mixture will turn out. Cool it to room temperature, stirring constantly with a whisk to prevent a crust from forming.
13. Have you cooled the mixture? Whip the cream to soft peaks. Don't overbeat or you'll end up with butter!!!
14. Add a couple of tablespoons of whipped cream to the gelatin mixture, which has cooled to room temperature, and mix quite intensively with a whisk. Then add the remaining whipped cream in several additions.
15. We’ll get this fluffy mixture.
16. Cut the biscuit into two parts. We cut off one part of the biscuit - the bottom one, slightly reducing it in diameter (so that it is less than 18 cm - the diameter of the mold). We don't need the top part of the biscuit. You can put it in a plastic bag and freeze it, and then, when needed, defrost it and make another cake. By and large, you don’t have to cut the biscuit, but then the cut won’t be as “spectacular.” We make sides from parchment and secure them, for example, with a clothespin or a paper clip. We do this so that the parchment does not “move out”. If you have cling film, use it, then after removing the film the sides will not look “crumpled”, which happened to me.
Lay out the biscuit...
17. ... and fill it with mousse. Place in the refrigerator for at least 4 hours. And even better - at night. Anticipating questions like “But my biscuit came up. Why???”, I will answer: “Nothing came up for me. Why did this happen to you - I don’t know!”
18. In the morning, I took the mousse cake out of the refrigerator, removed the parchment, sprinkled it with powdered sugar and decorated with fresh strawberries and mint leaves.
19. And here is a cross-section of a mousse cake. Enjoy your tea!